파이썬을 사용하여 XML을 다룰때 BeautifulSoup을 많이 사용합니다. 새로 환경을 구성하여 BeautifulSoup을 이용하는데 이전에 보지 못했던 에러가 발생했습니다.
강의 예제 코드 돌리다만난 에러라니...
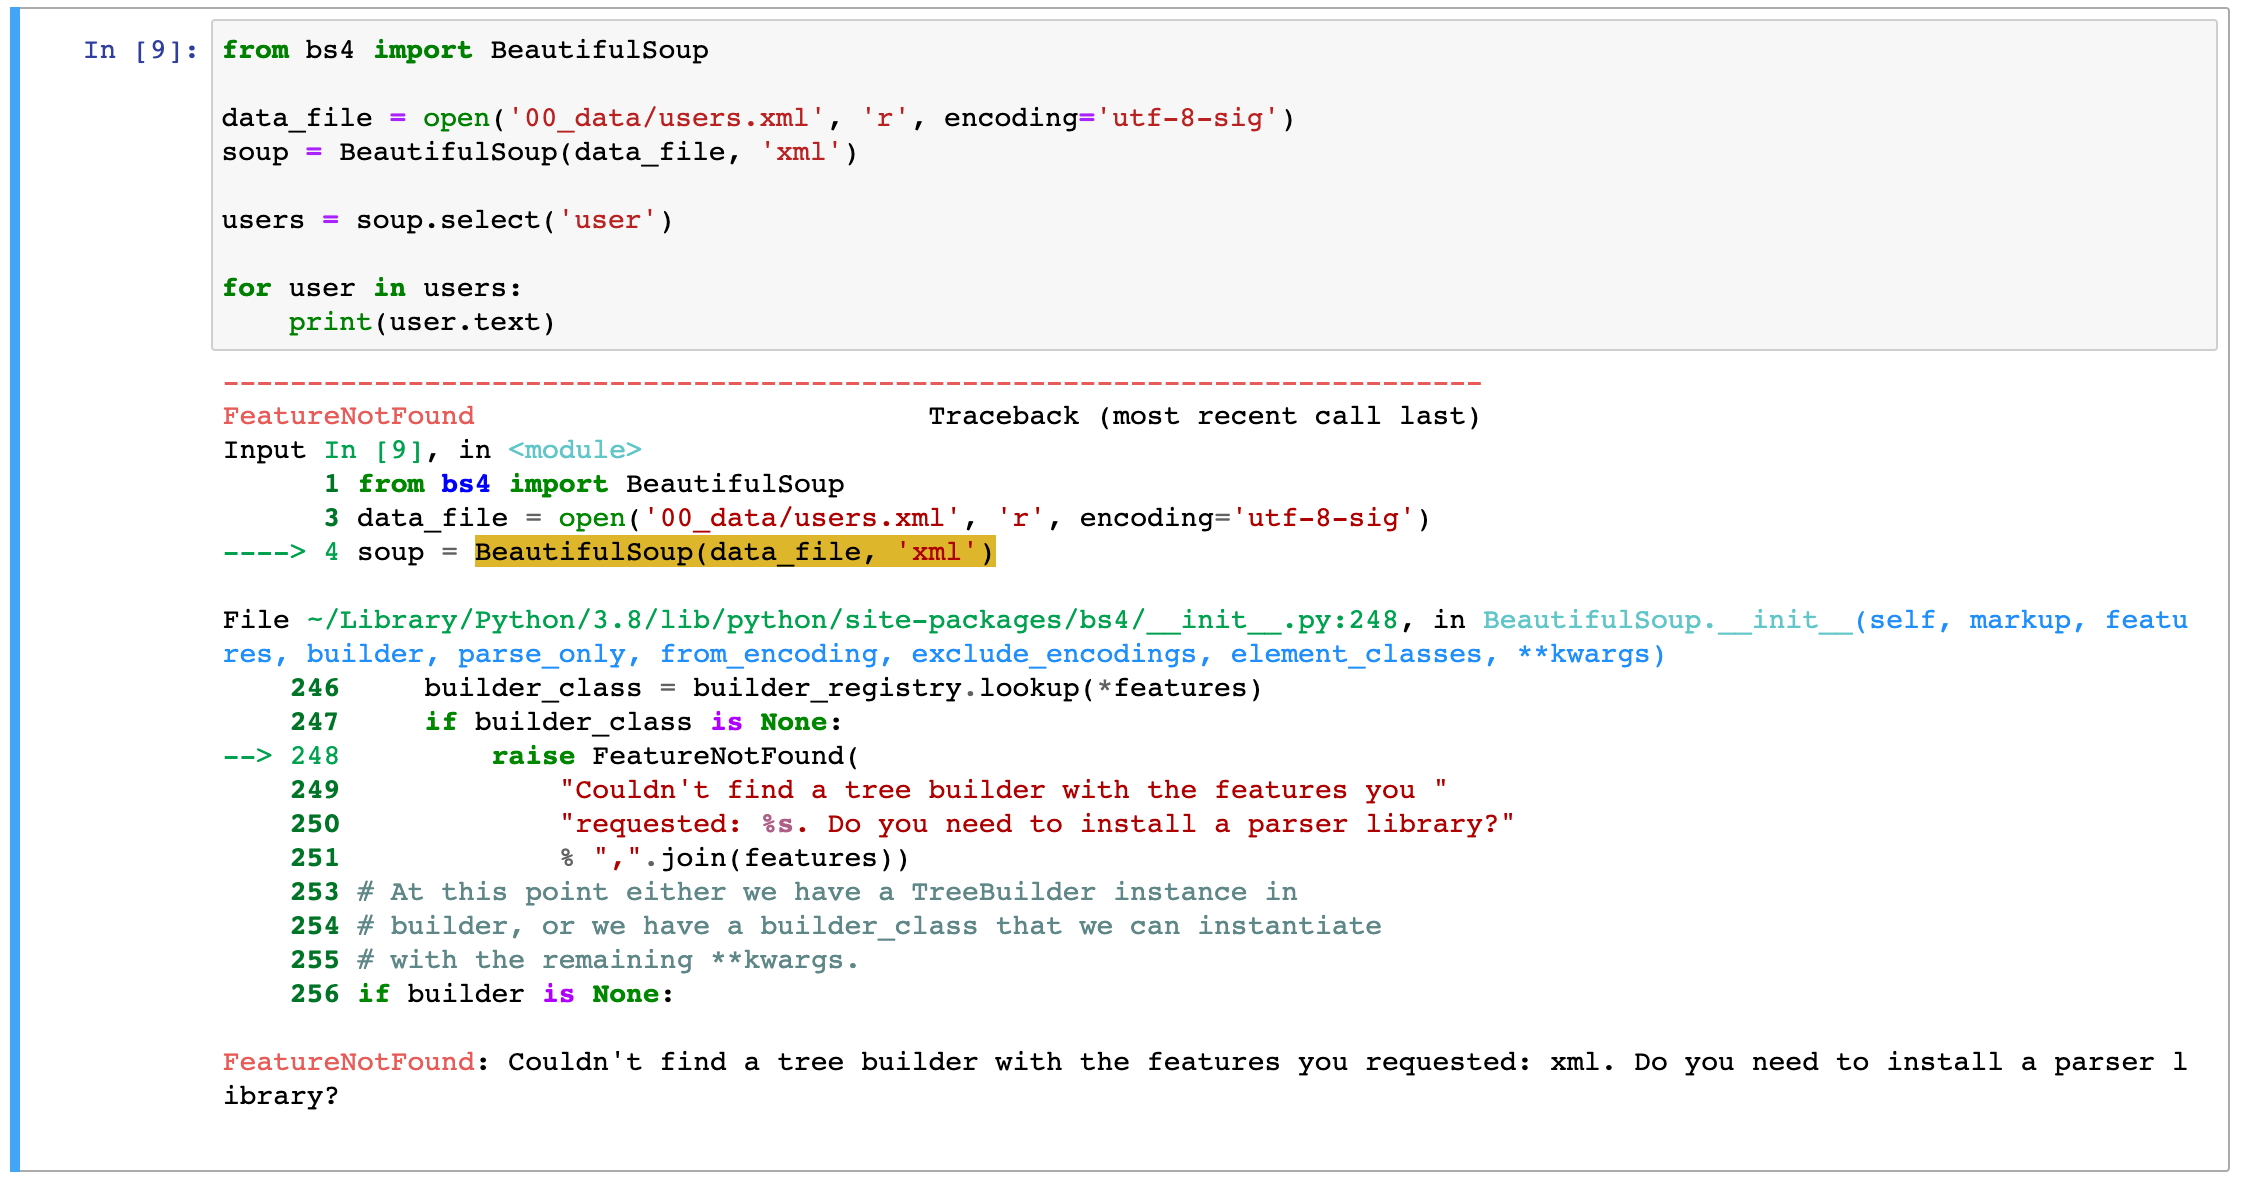
핵심 에러 메세지는 다음과 같습니다. BeautifulSoup 사용시 지정한 Feature가 없다는 내용입니다.
FeatureNotFound: Couldn't find a tree builder with the features you requested: xml. Do you need to install a parser library?
lxml 패키지 설치하기
`xml`이 문제라고 하는데 정확히 어떤 라이브러리를 설치해야 하는지 알려주지는 않는군요. 구글을 통해 검색을 해보니 `lxml` 라이브러리의 설치가 필요한 것 같습니다. Jupyter 노트북을 사용중이라 아래와 같이 설치를 진행해 봤습니다.
!pip 로 주피터 노트북에서 직접 패키지를 설치해 봅니다
설치가 되었으니 이제 잘 되겠지...했으나... 계속 패키지가 없다고 에러가 나옵니다. 난감하네요.
하아... 계속 에러가...
그래서 조금 더 검색을 해보니 주피터 노트북을 재기동 하라는 이야기가 있습니다. 구동중인 주피터를 중지하고 다시 실행했습니다.
Shutdown this notebook server (y/[n])? y
[C 11:01:20.436 NotebookApp] Shutdown confirmed
[I 11:01:20.439 NotebookApp] Shutting down 3 kernels
[I 11:01:20.443 NotebookApp] Kernel shutdown: 7a48be4a-c426-427b-b974-e8e26fccc994
[I 11:01:20.443 NotebookApp] Kernel shutdown: 45325d5b-9d8f-4f43-956f-d2b030475625
[I 11:01:20.443 NotebookApp] Kernel shutdown: d1b14c79-3741-4a14-9d0c-a5fe03a65532
[I 11:01:20.567 NotebookApp] Starting buffering for 45325d5b-9d8f-4f43-956f-d2b030475625:2d7ed833d3fe445c8b3ad49096ce9deb
[I 11:01:20.571 NotebookApp] Kernel shutdown: 45325d5b-9d8f-4f43-956f-d2b030475625
...
...
[I 11:01:20.967 NotebookApp] Shutting down 0 terminals
%
% jupyter notebook
[I 11:01:28.154 NotebookApp] Serving notebooks from local directory: /Users/nopd/dev
[I 11:01:28.154 NotebookApp] Jupyter Notebook 6.4.8 is running at:
[I 11:01:28.154 NotebookApp] http://localhost:8888/?token=731a38a75b038a956951174a7aa6da6d75acd13fe855ebd6
[I 11:01:28.154 NotebookApp]  or http://127.0.0.1:8888/?token=731a38a75b038a956951174a7aa6da6d75acd13fe855ebd6
[I 11:01:28.154 NotebookApp] Use Control-C to stop this server and shut down all kernels (twice to skip confirmation).
[C 11:01:28.157 NotebookApp]

    To access the notebook, open this file in a browser:
        file:///Users/nopd/Library/Jupyter/runtime/nbserver-45577-open.html
    Or copy and paste one of these URLs:
        http://localhost:8888/?token=731a38a75b038a956951174a7aa6da6d75acd13fe855ebd6
     or http://127.0.0.1:8888/?token=731a38a75b038a956951174a7aa6da6d75acd13fe855ebd6
다시 파일을 열어 코드를 실행해보니 이제 잘 됩니다.
주피터 재기동후 성공!
요약
0. 에러를 만난다 1. 에러를 잘 보고 필요한 패키지를 찾는다 : lxml 2. 주피터 노트북을 재기동한다 3. 계속 파이썬 코드를 잘 짠다
M1 silicon 맥북에서는 안되는게 참 많습니다. 새로운 CPU 아키텍쳐라서 여기저기서 패키지들이 오동작하거나 설치가 안되는 문제들이 많이 발생합니다. 오늘의 주인공인 파이썬 cryptography 패키지도 마찬가지입니다. 그나마 이 녀석은 에러가 나름 명확한 친구임에도 문제를 해결하기 위해 적지 않은 시간을 쏟아야 했습니다.
우선 에러 메세지 보고 가시겠습니다. :-) 이 에러 메세지는 pip install -r requirements.txt 를 수행하는 동안 발생헀고 requirements.txt 에는 cryptography가 기술되어 있었습니다. (드라마 24시에서 Following takes place... 하는 느낌이네요)
Building wheels for collected packages: cryptography
  Building wheel for cryptography (PEP 517) ... error
  ERROR: Command errored out with exit status 1:
...
...
 ...
    clang -Wno-unused-result -Wsign-compare -Wunreachable-code -fno-common -dynamic -DNDEBUG -g -fwrapv -O3 -Wall -iwithsysroot/System/Library/Frameworks/System.framework/PrivateHeaders -iwithsysroot/Applications/Xcode.app/Contents/Developer/Library/Frameworks/Python3.framework/Versions/3.8/Headers -arch arm64 -arch x86_64 -Werror=implicit-function-declaration -I/Users/nopd/project/venv/include -I/Library/Developer/CommandLineTools/Library/Frameworks/Python3.framework/Versions/3.8/include/python3.8 -c build/temp.macosx-10.14.6-arm64-3.8/_openssl.c -o build/temp.macosx-10.14.6-arm64-3.8/build/temp.macosx-10.14.6-arm64-3.8/_openssl.o -Wconversion -Wno-error=sign-conversion
  build/temp.macosx-10.14.6-arm64-3.8/_openssl.c:575:10: fatal error: 'openssl/opensslv.h' file not found
  #include <openssl/opensslv.h>
           ^~~~~~~~~~~~~~~~~~~~
  1 error generated.

      =============================DEBUG ASSISTANCE=============================
      If you are seeing a compilation error please try the following steps to
      successfully install cryptography:
      1) Upgrade to the latest pip and try again. This will fix errors for most
         users. See: https://pip.pypa.io/en/stable/installing/#upgrading-pip
      2) Read https://cryptography.io/en/latest/installation.html for specific
         instructions for your platform.
      3) Check our frequently asked questions for more information:
         https://cryptography.io/en/latest/faq.html
      =============================DEBUG ASSISTANCE=============================

  error: command 'clang' failed with exit status 1
  ----------------------------------------
  ERROR: Failed building wheel for cryptography
Failed to build cryptography
ERROR: Could not build wheels for cryptography which use PEP 517 and cannot be installed directly
화려한 에러 메세지이지만 결론은 설치가 잘 안되었다 입니다. DEBUG ASSISTANCE의 내용은 평이합니다. PIP가 구버전이라 그럴 수 있으니 업데이터 해보고 cryptography 설치 가이드 문서를 읽어 본 다음, faq에 단서가 있을지도 모르니 찾아보라는 내용입니다. TL;DR 하자면 아래의 한줄이 모든 것을 이야기 해주고 있었습니다.
build/temp.macosx-10.14.6-arm64-3.8/_openssl.c:575:10: fatal error: 'openssl/opensslv.h' file not found
Trouble Shoot #1 - Install separate openssl with brew
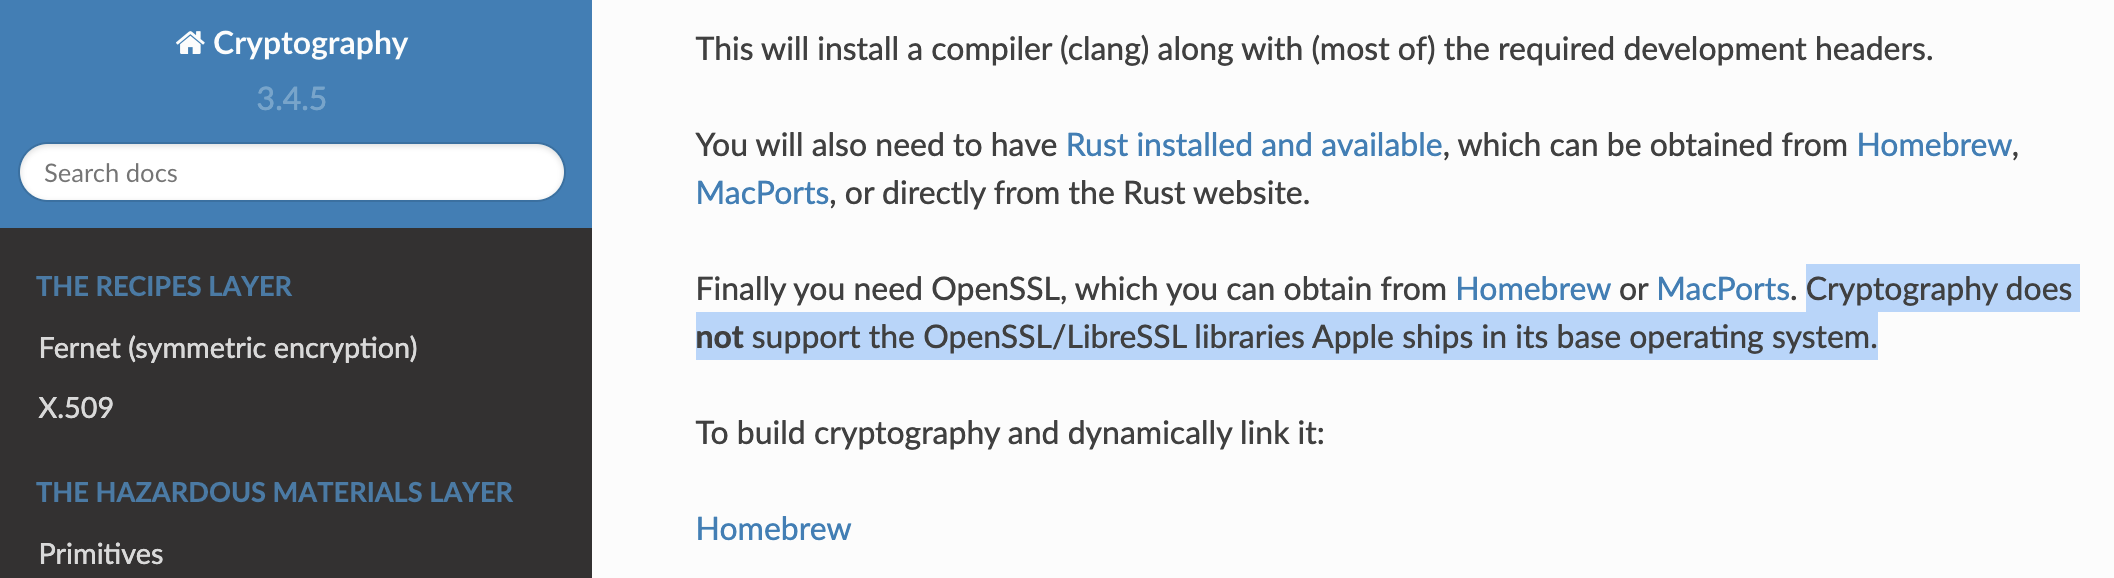
구글 검색을 통해 살펴봤던 문서를 종합해보면 M1 silicon 기종에 선탑재되어 나오는 openssl이 cryptography 빌드에 필요한 버전과 상이하다고 합니다. 실제로 M1 silicon 탑재 기종에서 openssl version 명령으로 버전을 확인해보면 LibreSSL 이 설치되어 있는 것을 알 수 있습니다. 아래와 같이 brew 를 이용해 openssl 을 별도로 설치해 보도록 하겠습니다. 공식 가이드에서 안내하는 1.1 버전을 지정해서 설치 진행했습니다.
cryptography 설치 가이드의 안내 (https://cryptography.io/en/latest/installation/)
Trouble Shoot #2 - Uninstall cffi then install cryptography again
별도의 openssl 설치와 혹시 몰라서 rust(cryptography는 rust를 사용합니다)를 설치하는 작업이 끝나면 이제 파이썬 패키지중에서 C언어를 호출할 때 사용되는 cffi 도 삭제후에 다시 설치해 주도록 하겠습니다. 아래의 명령을 순서대로 터미널에서 입력하면 cryptography 가 설치됩니다. 제 경우 cryptography를 3.3.1 버전으로 지정해서 사용할 일이 있어서 버전을 지정했습니다만 그렇지 않은 경우에는 버전 정보를 빼고 설치하면 되겠습니다.
어제는 간만에 Flutter로 코드 만들어 보느라 고생했고 오늘은 또 간만에 파이썬으로 코드 만드느라 고생중입니다. 그 사이에 무슨 일이 있었던 것인가... (빅써 없데이트!?) 갑작스레 새 코드 프로젝트를 만들기 위해 virtualenv 를 돌리는데 Library not loaded 에러가 발생합니다. 자연스레 pip 로 virtualenv 를 업데이트 해볼랬더니.. 어라? pip도 동작을 안합니다.
% virtualenv
dyld: Library not loaded: /System/Library/Frameworks/CoreFoundation.framework/Versions/A/CoreFoundation
  Referenced from: /Library/Frameworks/Python.framework/Versions/3.6/Resources/Python.app/Contents/MacOS/Python
  Reason: image not found
zsh: abort      virtualenv
% pip
dyld: Library not loaded: /System/Library/Frameworks/CoreFoundation.framework/Versions/A/CoreFoundation
  Referenced from: /Library/Frameworks/Python.framework/Versions/3.6/Resources/Python.app/Contents/MacOS/Python
  Reason: image not found
zsh: abort      pip
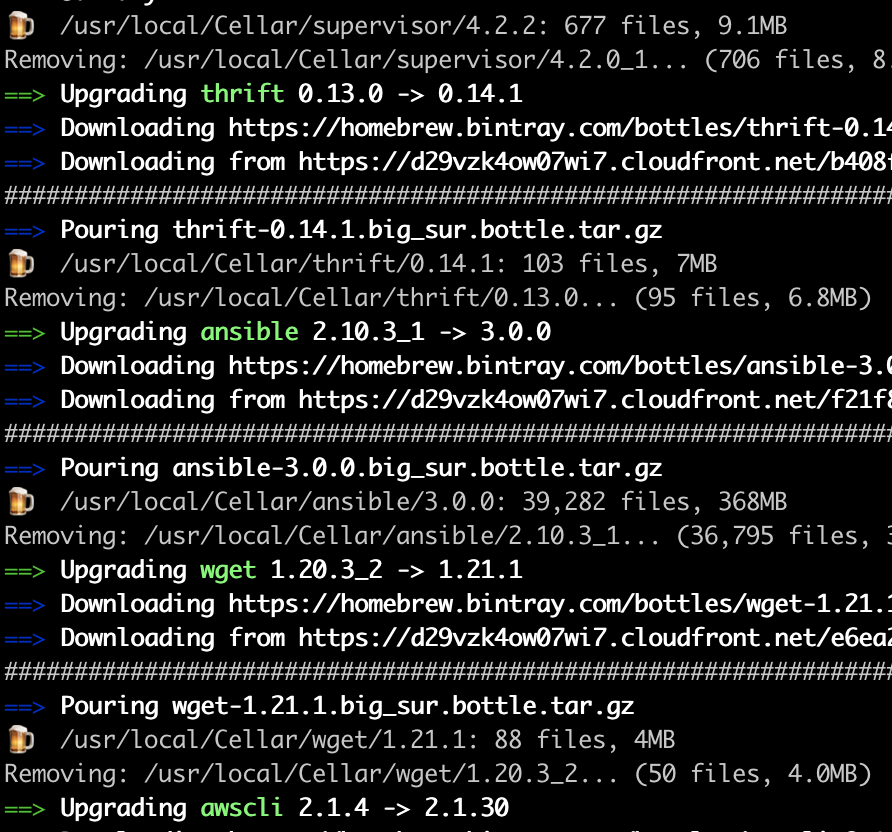
뭔가 운영체제 업데이트가 되면서 symlink가 꼬인 느낌이라 과감히 brew 로 파이썬을 재설치 해보기로 했습니다. 의존성이 걸려있는 패키지가 너무 많은 탓인지 업데이트가 한참 걸리네요. 열심히 다운로드 받고 설치하는 동안 저의 맥북프로는 또 다시 이륙을 하고는 고도를 높여 나갑니다...
% brew install python
Updating Homebrew...
==> Auto-updated Homebrew!
Updated 3 taps (homebrew/core, homebrew/cask and homebrew/services).
...
...
==> Installing python@3.9
==> Pouring python@3.9-3.9.2_1.big_sur.bottle.tar.gz
Error: The `brew link` step did not complete successfully
The formula built, but is not symlinked into /usr/local
Could not symlink bin/2to3
Target /usr/local/bin/2to3
already exists. You may want to remove it:
  rm '/usr/local/bin/2to3'

To force the link and overwrite all conflicting files:
  brew link --overwrite python@3.9

To list all files that would be deleted:
  brew link --overwrite --dry-run python@3.9

Possible conflicting files are:
/usr/local/bin/2to3 -> /Library/Frameworks/Python.framework/Versions/3.6/bin/2to3
/usr/local/bin/easy_install-3.9 -> /usr/local/Cellar/python@3.9/3.9.0_2/bin/easy_install-3.9
/usr/local/bin/idle3 -> /Library/Frameworks/Python.framework/Versions/3.6/bin/idle3
/usr/local/bin/pip3 -> /usr/local/Cellar/python@3.9/3.9.0_2/bin/pip3
/usr/local/bin/pip3.9 -> /usr/local/Cellar/python@3.9/3.9.0_2/bin/pip3.9
/usr/local/bin/pydoc3 -> /Library/Frameworks/Python.framework/Versions/3.6/bin/pydoc3
/usr/local/bin/python3 -> /Library/Frameworks/Python.framework/Versions/3.6/bin/python3
/usr/local/bin/python3-config -> /Library/Frameworks/Python.framework/Versions/3.6/bin/python3-config
==> /usr/local/Cellar/python@3.9/3.9.2_1/bin/python3 -m ensurepip
==> /usr/local/Cellar/python@3.9/3.9.2_1/bin/pip3 install -v --global-option=--no-user-cfg --install-option=--force --install-option=--single-version-externally-managed --install-option=--record=installed.txt --upgrade --target=/usr/local
==> /usr/local/Cellar/python@3.9/3.9.2_1/bin/pip3 wheel --wheel-dir=/usr/local/Cellar/python@3.9/3.9.2_1/Frameworks/Python.framework/Versions/3.9/lib/python3.9/ensurepip/_bundled /usr/local/Cellar/python@3.9/3.9.2_1/libexec/setuptools /us
==> Caveats
Python has been installed as
  /usr/local/bin/python3

Unversioned symlinks `python`, `python-config`, `pip` etc. pointing to
`python3`, `python3-config`, `pip3` etc., respectively, have been installed into
  /usr/local/opt/python@3.9/libexec/bin

You can install Python packages with
  pip3 install <package>
They will install into the site-package directory
  /usr/local/lib/python3.9/site-packages

See: https://docs.brew.sh/Homebrew-and-Python
...
...
brew 의 로그를 보면서 에러가 난 부분들을 집중적으로 살펴봅니다. 확실히 python 3.9 를 설치하는 과정에 link 연결이 원활하지 않은게 보이는군요. 설치가 끝나는대로 brew link 명령을 --overwrite 으로 돌려보는게 좋을 것 같습니다. 그나저나 설치는 언제 끝나나...하고 있는데 설치가 끝났네요. 자 한번 brew link 를 수행해 보겠습니다
% brew link --overwrite --dry-run python@3.9
Would remove:
/usr/local/bin/2to3 -> /Library/Frameworks/Python.framework/Versions/3.6/bin/2to3
/usr/local/bin/idle3 -> /Library/Frameworks/Python.framework/Versions/3.6/bin/idle3
/usr/local/bin/pydoc3 -> /Library/Frameworks/Python.framework/Versions/3.6/bin/pydoc3
/usr/local/bin/python3 -> /Library/Frameworks/Python.framework/Versions/3.6/bin/python3
/usr/local/bin/python3-config -> /Library/Frameworks/Python.framework/Versions/3.6/bin/python3-config
%
% brew link --overwrite python@3.9
Linking /usr/local/Cellar/python@3.9/3.9.2_1... 21 symlinks created.
%
%
% python3
dyld: Library not loaded: /System/Library/Frameworks/CoreFoundation.framework/Versions/A/CoreFoundation
  Referenced from: /Library/Frameworks/Python.framework/Versions/3.6/Resources/Python.app/Contents/MacOS/Python
  Reason: image not found
zsh: abort      python3
하아... 뭔가 잘 해결이 안되었네요. 분명 3.9 를 설치한 것 같은데 에러 내용의 중간을 보니 3.6을 참조하고 있는게 문제인 듯 싶습니다. python3 의 위치를 탐색해서 강제로 symlink 를 변경해 보도록 하겠습니다.
% which python3
/Library/Frameworks/Python.framework/Versions/3.6/bin/python3
%
%
% cd /Library/Frameworks/Python.framework/Versions/3.6/bin/
% rm python3
%
% which python3
/usr/local/bin/python3
하하~! 요렇게 하니 이제 새로 설치된 python3.9 버전이 잘 실행이 됩니다. 그러나 여전히 virtualenv나 pip가 제대로 동작하지 않았습니다.
% python3
Python 3.9.2 (default, Feb 24 2021, 13:26:09)
[Clang 12.0.0 (clang-1200.0.32.29)] on darwin
Type "help", "copyright", "credits" or "license" for more information.
>>>
뭐가 문제일까 하다가... 문득 .bash_profile 에 추가되었던 PATH 정보가 생각나서 이 부분을 모두 제거하고 터미널을 재기동 해보았습니다. 그리고 나니 이제야 제대로 동작하는 virtualenv 와 pip..!! 개발 환경은 처음 설정이 늘 어렵고 번거롭고... 그런것 같습니다 ㅎㅎ. 비슷한 어려움을 겪는 분들이 계시다면,
1. brew 로 python 패키지 업데이트 2. symlink 가 이상하게 걸려 있는지 확인 3. PATH 로 잡혀 있는 파이썬 디렉토리 확인